
Downgrading Android Apps Without Erasing User Data
Published:
I recently ran into an issue where I installed a broken unstable-branch update to the Android app F-Droid on my phone. This led to the app immediately crashing when launched. When considering how I could roll back the app to an older version, I was surprised to find out that Android does not allow you to roll back app updates through the user interface. Instead, it forces you to uninstall the app first, erasing all of the app’s user data in the process.
After doing some research, I found out that you can actually roll back Android applications by enabling USB-debugging and using Android Debug Bridge to force-install an old version of an app over a newer version, keeping all existing user data.
Overview
Here is a quick overview of the steps that need to be taken to successfully downgrade an app on Android without erasing user data:
- Download and install Android Debug Bridge (adb)
- Download the apk for the older version of the app you want to downgrade
- Enable USB debugging
- Connect the phone to your computer and perform the downgrade using adb
- Disable USB debugging
Downgrading Android Apps
1. Download and install Android Debug Bridge (adb)
Android Debug Bridge is available on multiple platforms through the Android SDK Platform-Tools. You can find the link to download it for Windows, Mac, and Linux here. Additionally, if you are on a Linux distribution, adb is likely available in your distribution’s standard software repositories and can be installed that way. (Ex. apt install adb).
2. Download the apk for the older version of the app you want to downgrade
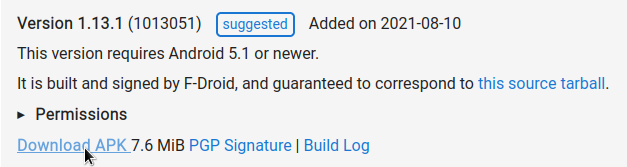
This part will differ for you if you are doing this with a different app. For me, I downloaded the apk for an older version of F-Droid directly from the official website at the bottom of this page.
3. Enable USB debugging
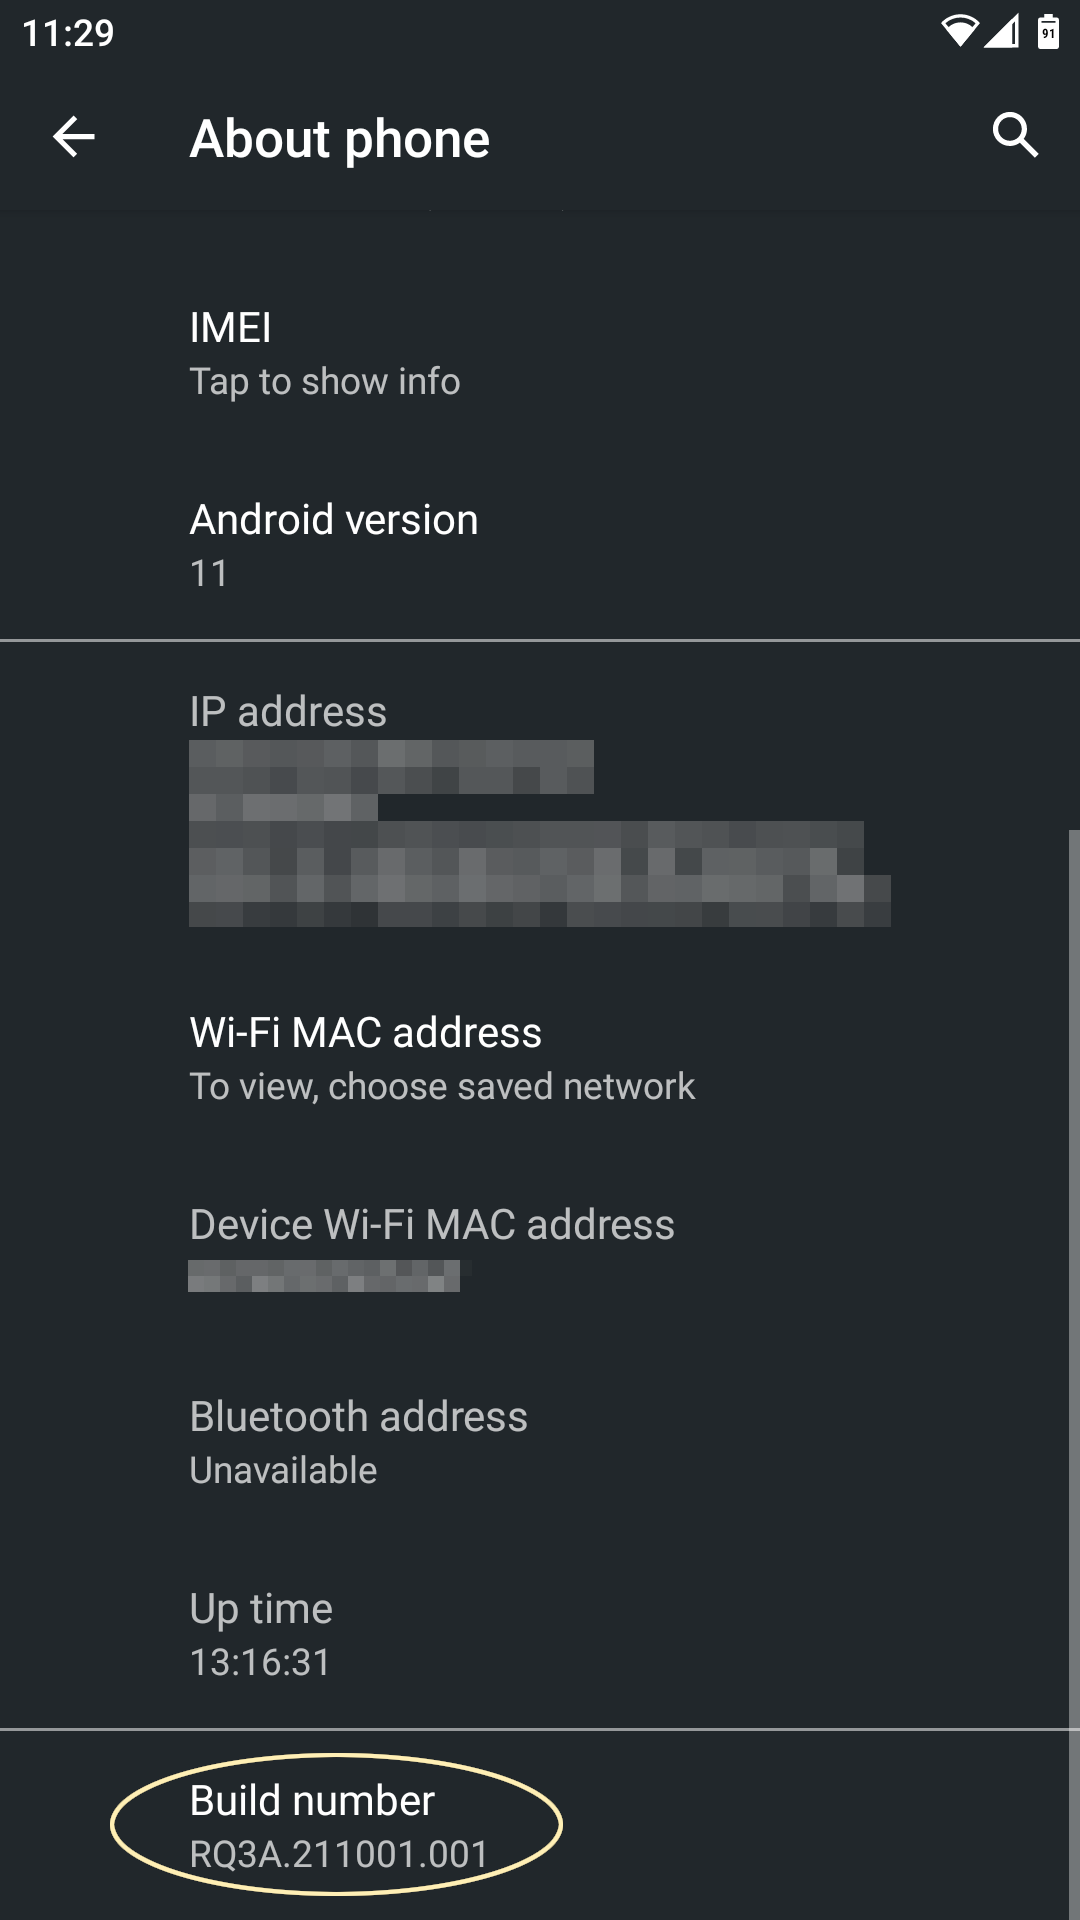
To enable USB debugging, you must first enable the hidden Developer options in the Android Settings app. In Settings, go to About Phone and tap on Build Number until you receive a small popup that says you are now a developer.
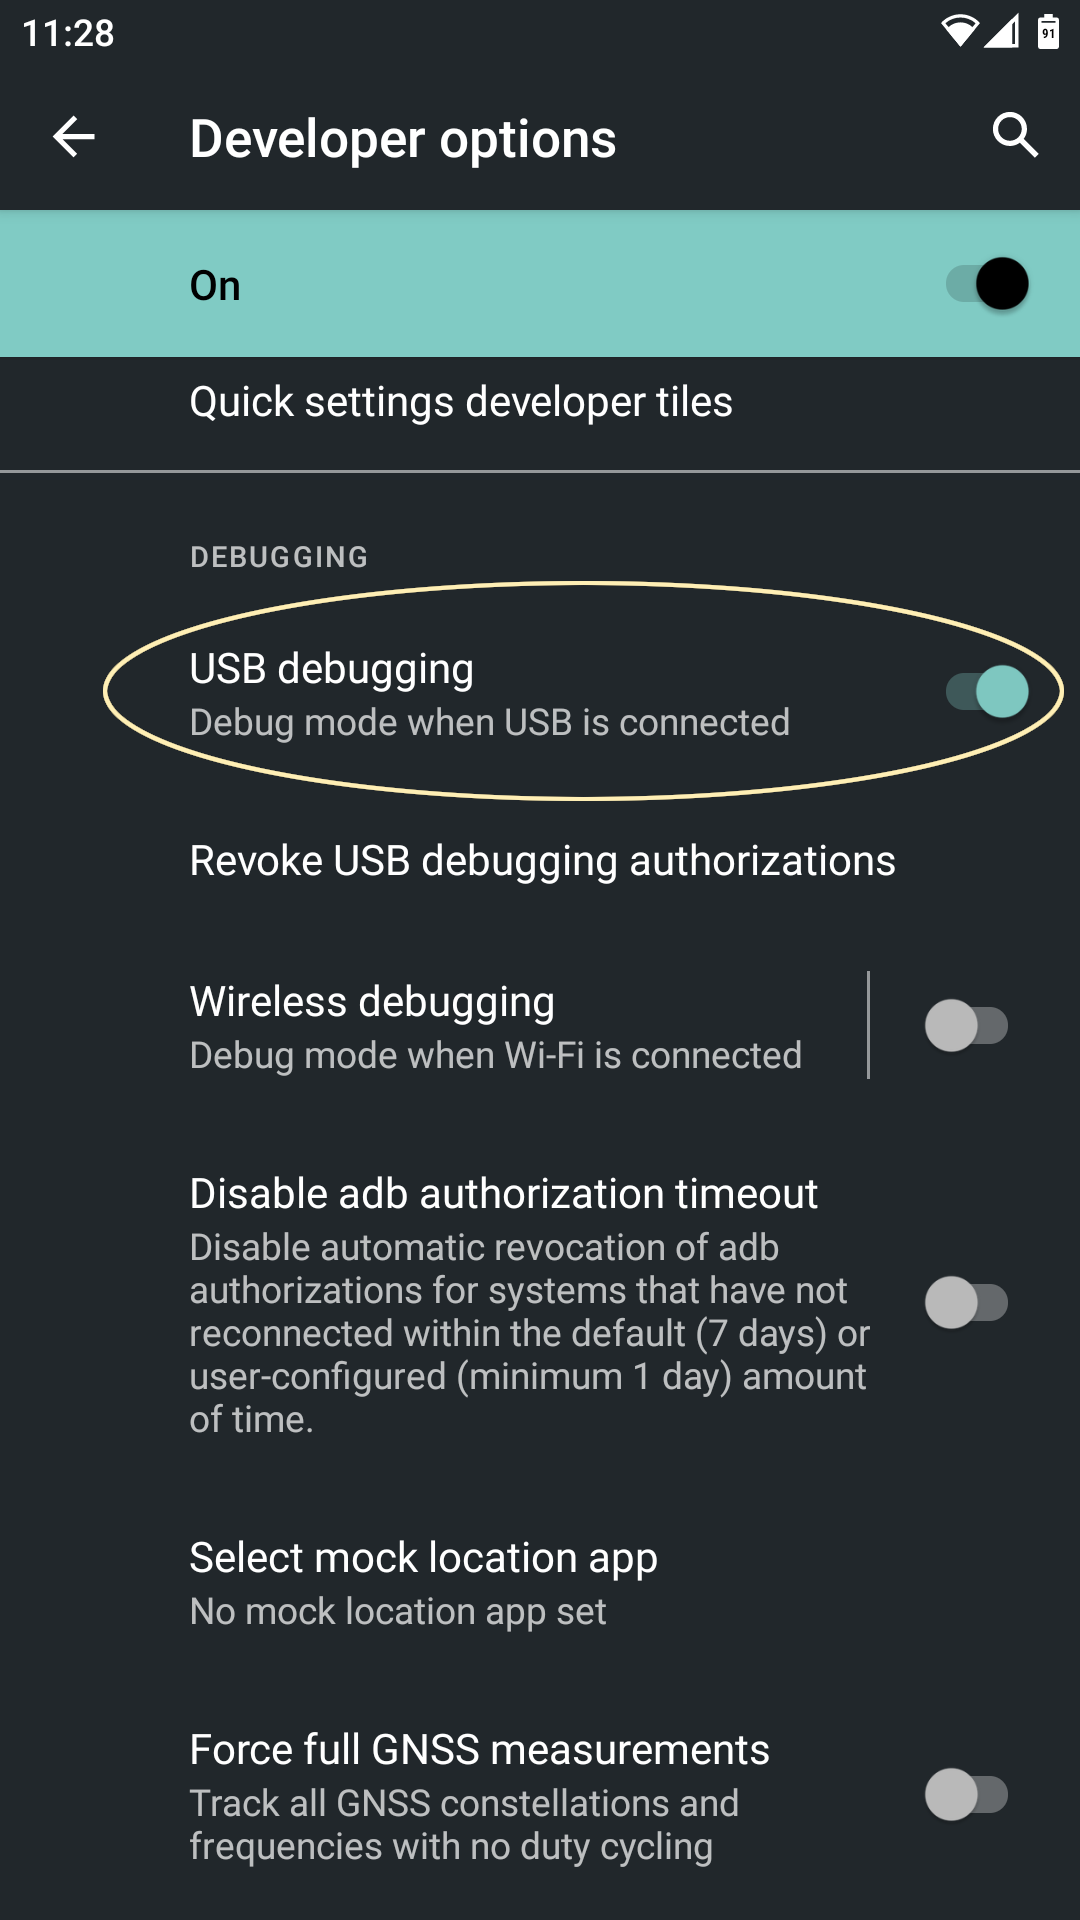
Then, you will see Developer options listed under Settings > System > Developer options. Inside the Developer options screen, scroll down to the Debugging section and enable the USB debugging option.
4. Connect the phone to your computer and perform the downgrade using adb
Connect your phone to your computer over USB. Open a terminal window and run the command:
adb install -r -d appname.apk
where appname.apk is replaced with the apk downloaded in step 2. The -r switch specifies that we are reinstalling an already installed app. The -d switch specifies that we want to allow downgrading.
When you first run this command, if you have never used USB debugging on your phone, you will receive a permission denied error and a prompt on your phone asking if you want to allow USB debugging. Accept the prompt that asks if you want to authorize your computer for USB debugging. Then, rerun the above command. It will take a few seconds as the app is installed onto your device.
5. Disable USB debugging
For security reasons, it is a good idea to disable USB debugging on your phone after you are done using it. To do so, go back to Settings > System > Developer options, scroll down to the Debugging section, and disable the USB debugging option.